Whether you want easier repairs or space for another car, a lift helps you get more from your garage. Find out what each lift type offers, which accessories make the job easier, and how to build a safe lifting routine.
Workshop illustration. Follow the instructions for your lift and vehicle.
01
Choose your lift
Service & repairs
Two-post: get closer to the work
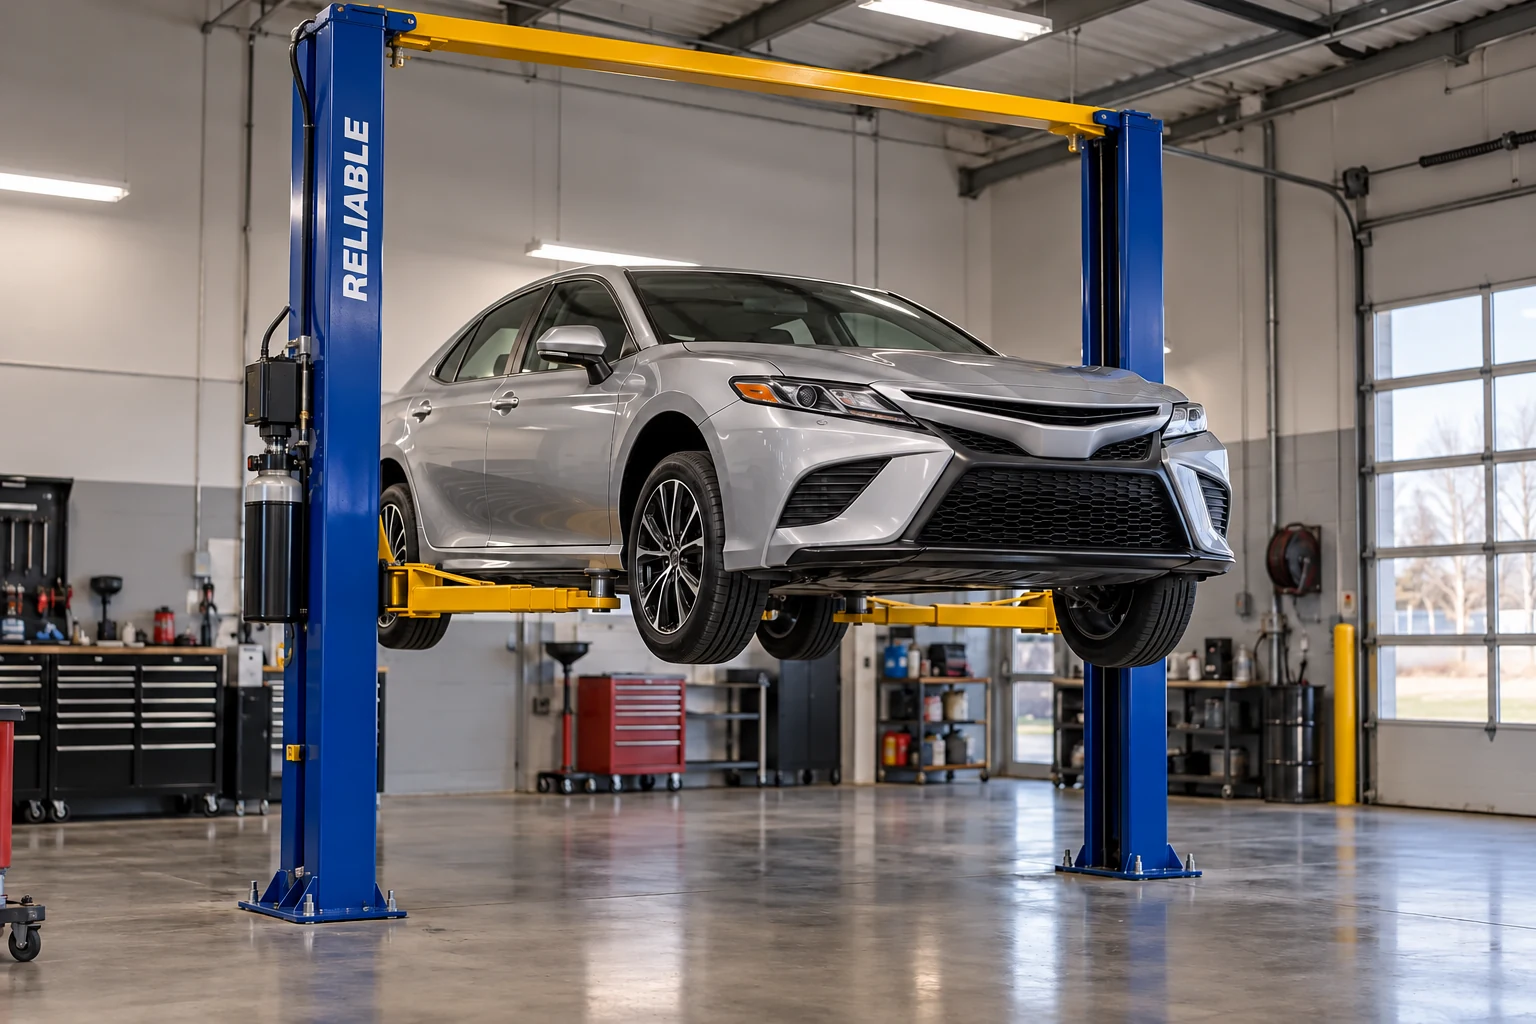
A two-post lift raises the vehicle at its lifting points, leaving the wheels free for tire, brake, and suspension work. It also gives you easy access to work underneath. It’s a practical choice for home mechanics, restorations, and busy repair shops.
The arms swing under the vehicle for lifting and move clear for driving in and out. Before lifting, position the pads at the vehicle’s recommended lifting points and check that the vehicle is balanced.
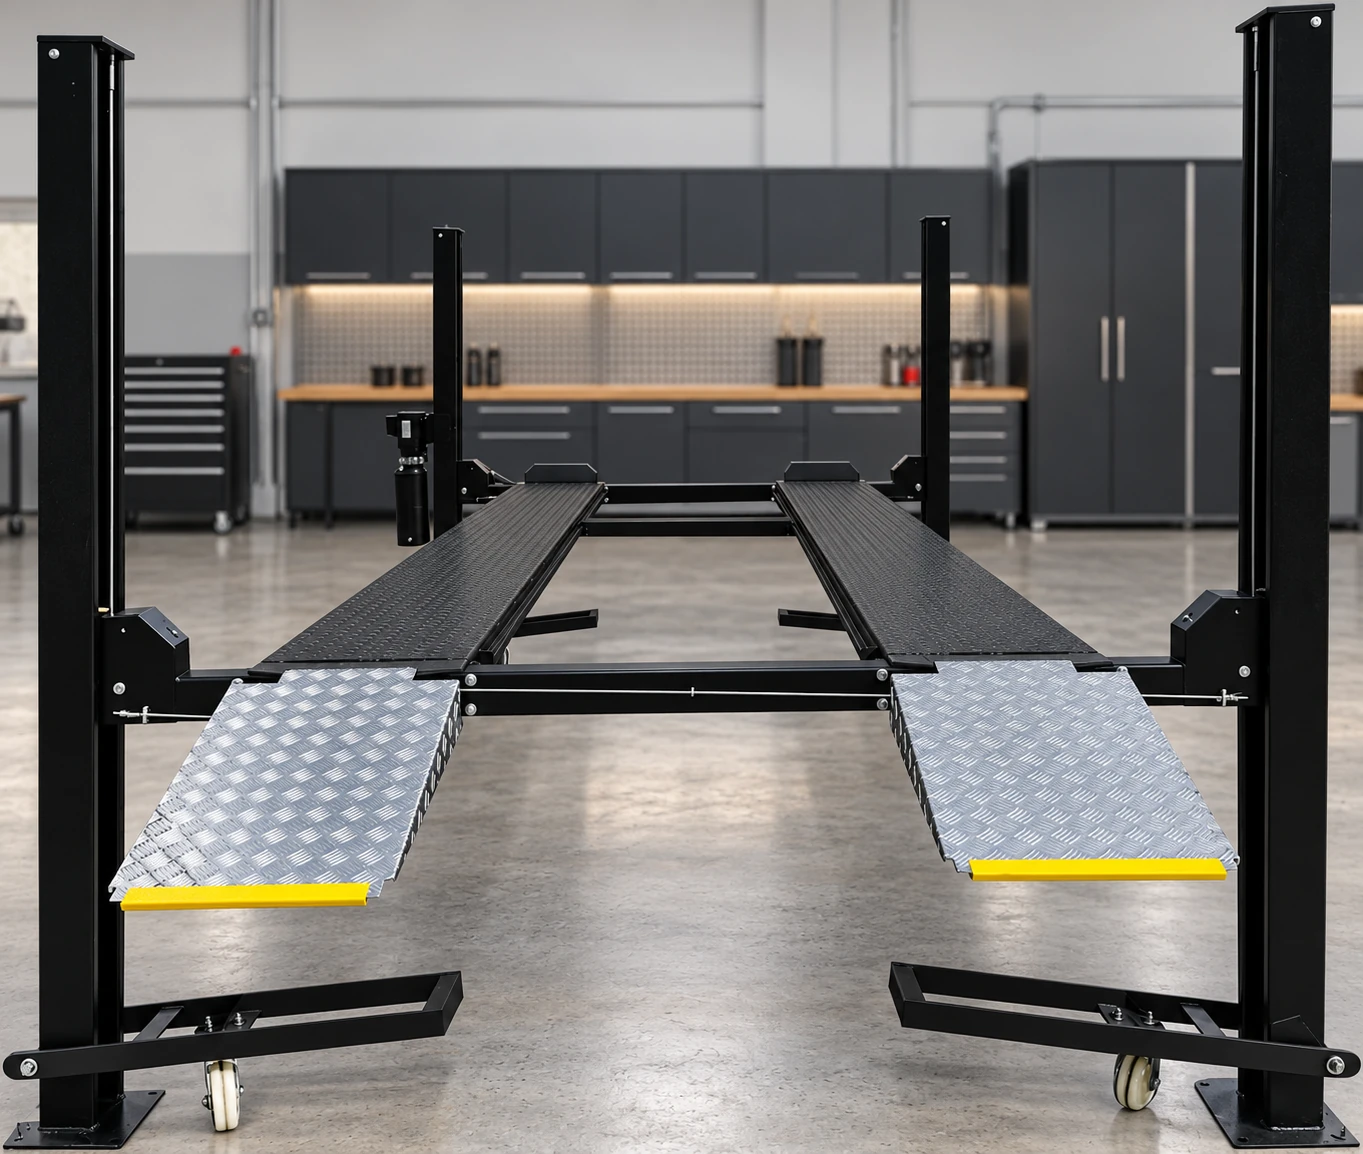
A four-post lift supports the tires on two runways. Drive on, raise the vehicle, and use the space below for another car. It’s a popular setup for collectors, weekend projects, and garages that need more parking.
There’s also easy access for work underneath. Add a suitable bridge jack or jack-tray setup when you need the wheels free for service.
Check three things: vehicle weight, room around the lift, and clearance above it. Include cargo and accessories in the vehicle’s weight. Leave room to open doors and work, and check garage-door tracks and openers as well as the ceiling.
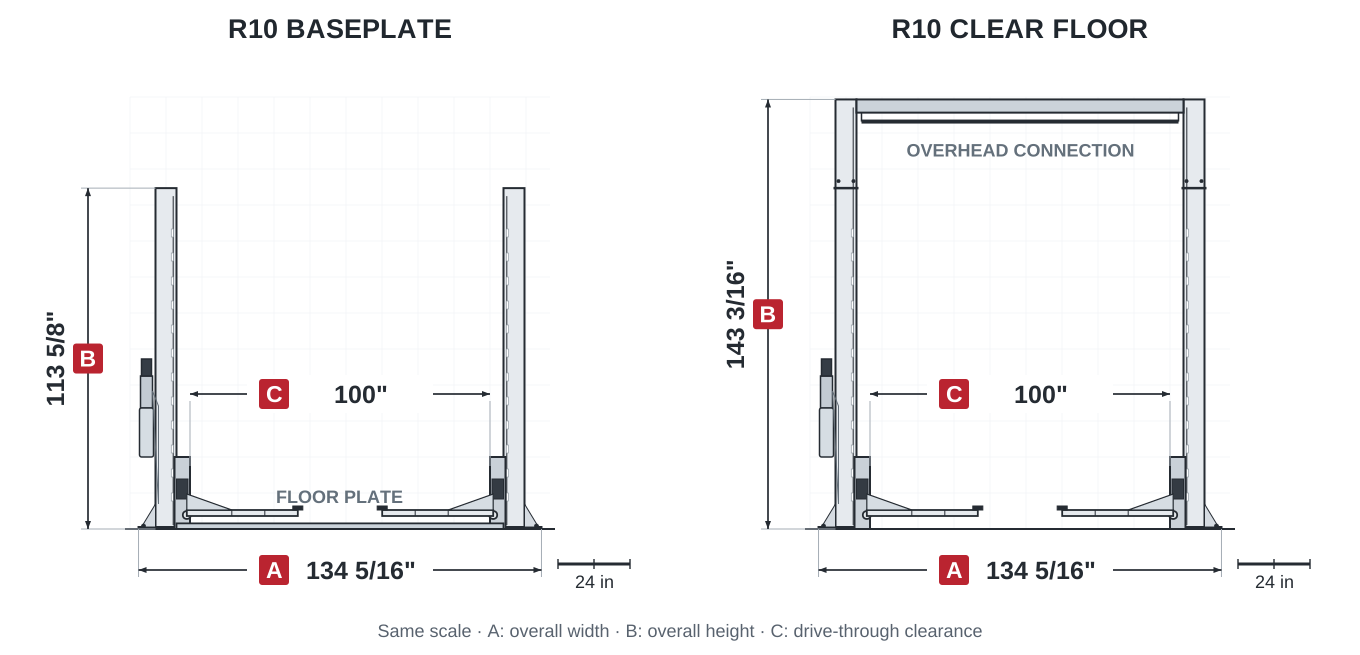
A baseplate lift has a low cover across the floor between the posts. Its open-top layout suits garages with lower ceilings. A clear-floor lift routes the cables and hose overhead, leaving an open path for tool carts and transmission jacks.
R10 examples shown to scale; the baseplate model is lower. Compare actual lift specifications before choosing. Open full-size drawing ↗
Two-stage or three-stage arms?
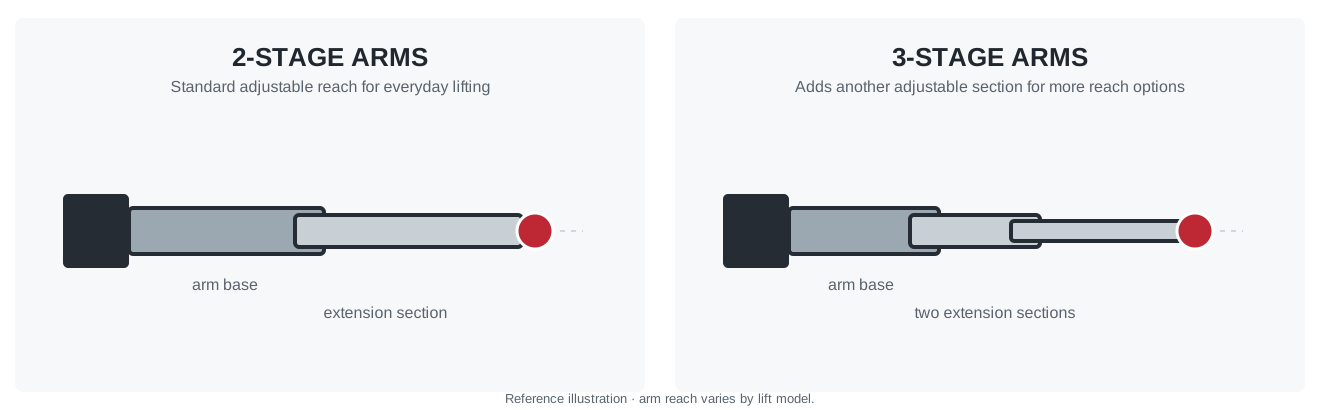
Three-stage arms give you more freedom to reach different lifting points and position different-sized vehicles. The extra sliding section adds flexibility, while standard two-stage arms provide versatile reach for everyday cars and trucks.
For reference only; arm reach varies by model. Compare reach and vehicle fit with the actual lift specifications. Open full-size drawing ↗
Symmetrical or asymmetrical?
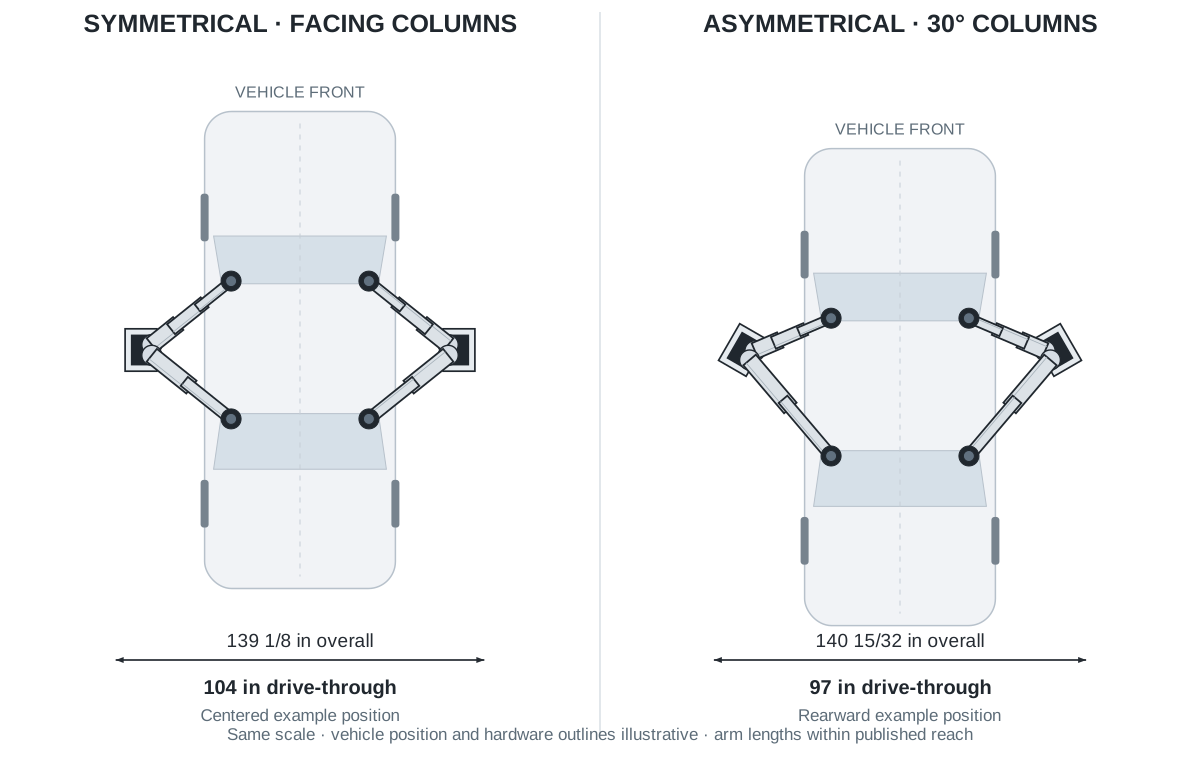
A symmetrical setup positions the vehicle more evenly around the posts. An asymmetrical setup places more of the vehicle behind them, often leaving more room to open the doors. Our R10 combo arms offer both arrangements, with three-stage front arms for added positioning flexibility.
R10 10K example shown to scale. Configurations and clearances vary; compare the actual lift specifications. Open full-size drawing ↗
Direct drive or chain drive?
Chain drive pairs hydraulic cylinders with lifting chains—a proven design used in garages for decades. It offers strong value for home garages and small shops. Direct drive uses hydraulic cylinders to raise the carriages directly, removing the lifting chains and their rollers. Fewer moving parts and fewer chain components to maintain make it a popular choice for busy commercial shops. Our baseplate lifts use chain drive; our clear-floor range offers both.
Single-point or dual-point release?
Single-point lets you release the safety locks from one location. Dual-point requires a release at each post. In either case, the mechanical locks support the vehicle while you work.
Four-post power and locks
110V power.
Our 110V four-post options draw about 10A while running and 20A at startup. They’re designed for common grounded home and garage outlets on a suitable 20A circuit, helping avoid a 30A electrical upgrade. Many competing 110V lifts require a 30A circuit, which often means new wiring, an outlet, and a breaker. Our 110V options don’t require that 30A setup. Use the correct circuit and grounding; have a licensed electrician handle any needed changes. See the Installation Guide for electrical details.
Single-point mechanical locks.
Our four-post storage lifts use galvanized mechanical safety locks with a single-point manual release. One handle releases all four corners. Galvanized parts resist rust, and this proven design needs no compressor or air lines.
Air-operated releases
Air-operated releases appear on some competitor four-post models. The vehicle still rests on mechanical locks; air operates the release. Air systems add a compressor, lines, seals, and upkeep. Moisture, freezing weather, clogged parts, and leaks create extra service problems. A failed actuator can leave a vehicle raised until the release system is repaired. Our manual release avoids those extra air-system parts.
03
Before you start
Always confirm lifting configurations, vehicle placement, and accessory use with your owner’s manual. Get familiar with the controls, then make these checks part of every job:
Check the vehicle’s weight and the lift’s loading limits.
Look for damaged pads, worn cables, leaks, or loose parts.
Clear people, tools, and other vehicles from the lift’s path.
Check the space above the vehicle and make sure nobody is inside it.
Always lower onto the safety locks before working underneath. Hydraulic pressure alone is not enough.
04
Accessories that make the job easier
Use accessories made for your lift and stay within their weight limits.
Truck adapters and lifting pads
They help the arms reach the proper lifting points on trucks and SUVs, including those with running boards or nerf bars. Keep the pads on the recommended lifting points, not on the steps or bars. Seat them securely. Never substitute wood blocks or stack adapters unless the instructions specifically allow it.
Jack trays
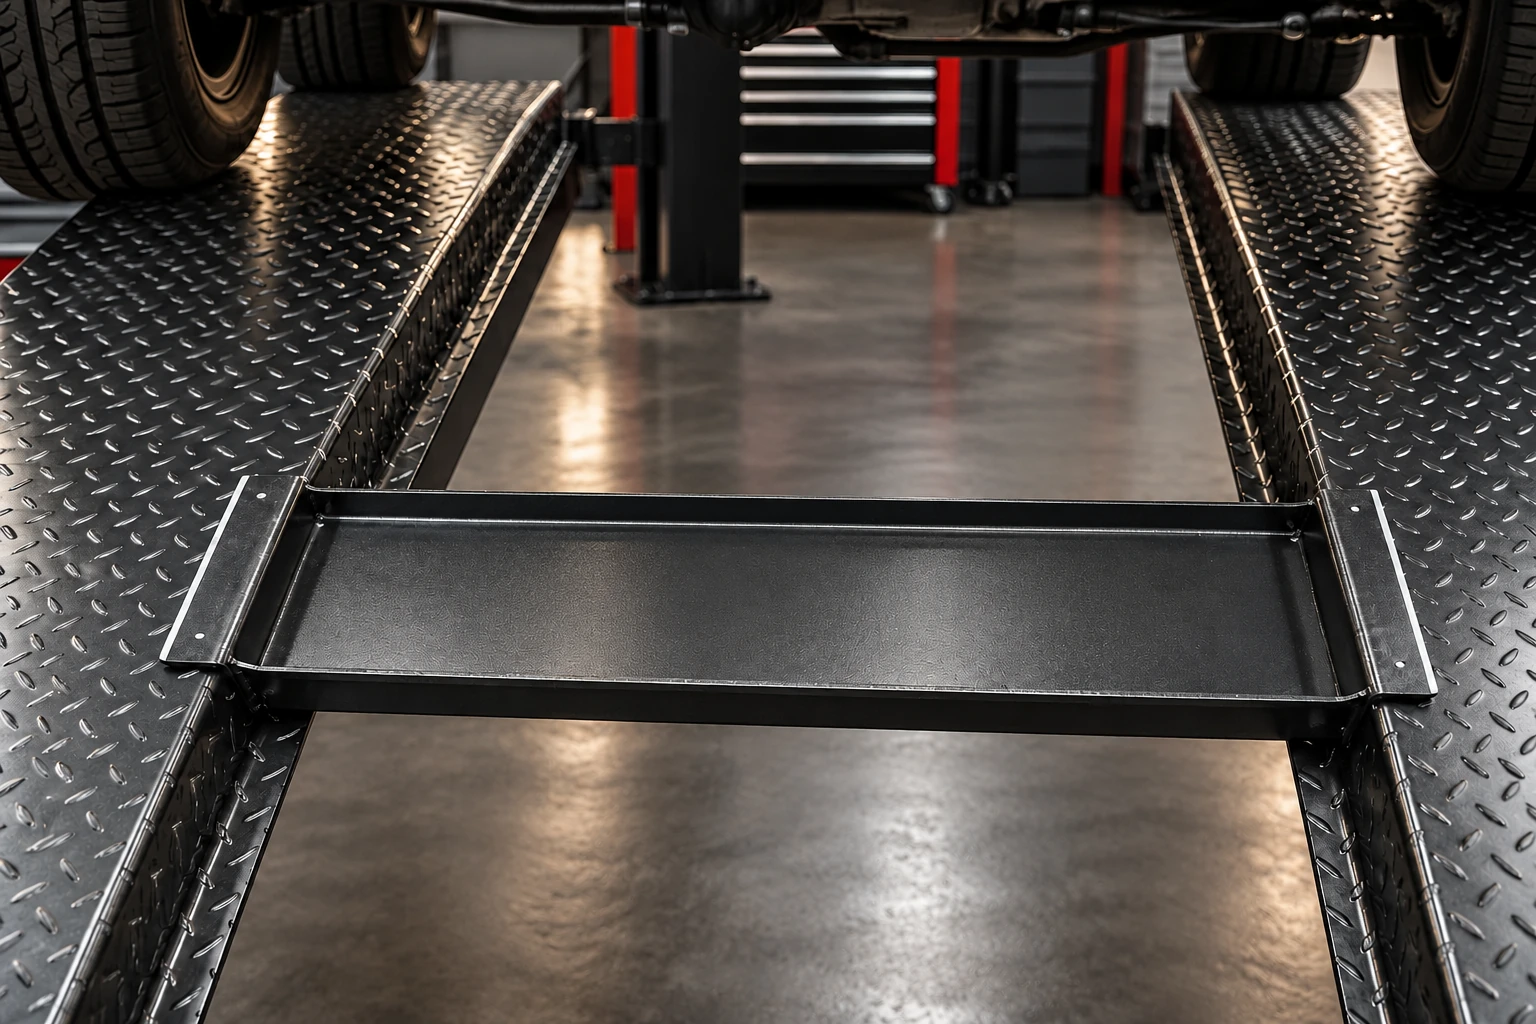
They hold a separate jack between the runways of a four-post lift. The tray does not lift by itself. Check the tray and jack ratings, and use the specified supports before working beneath a raised vehicle.
Bridge jacks
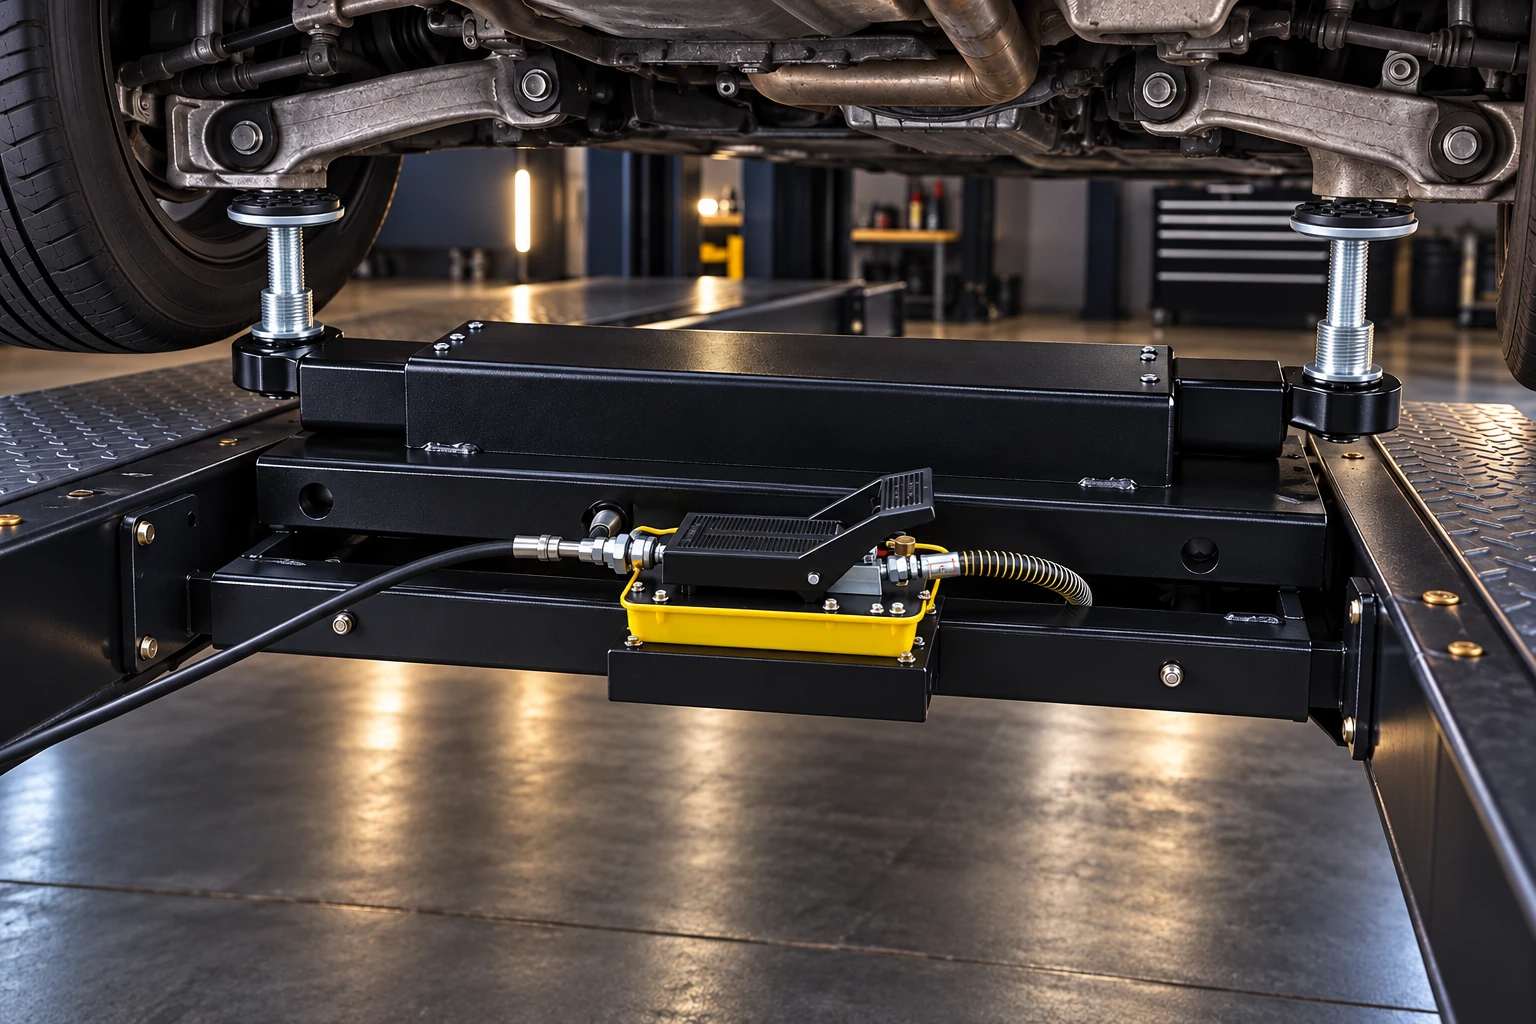
They raise the front or rear of a vehicle off the runways for tire, brake, and suspension work. Position the pads at the proper lifting points and engage the jack’s locks before service.
Drip trays
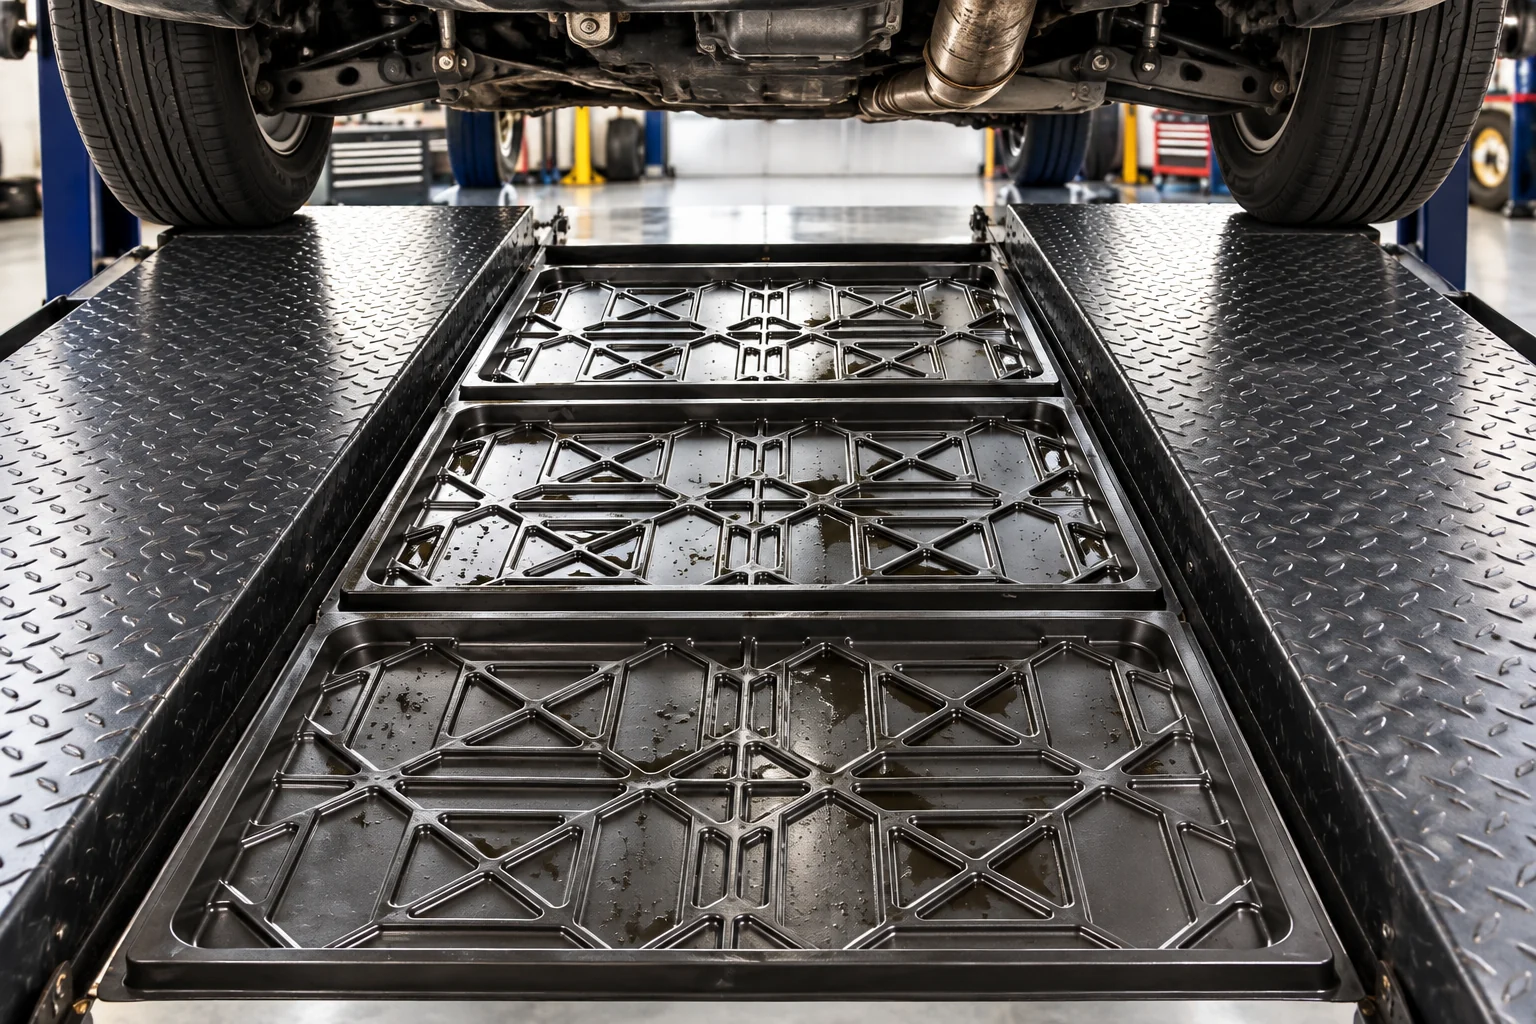
They help protect the car parked below from fluid drips. They are not walking platforms or vehicle supports.
Caster kits
They use a compatible four-post lift’s own power to raise the empty lift off its feet and onto the caster wheels. One person then rolls it across a smooth, level floor. Lower the lift back onto its feet before loading a vehicle.
Steel and aluminum ramps
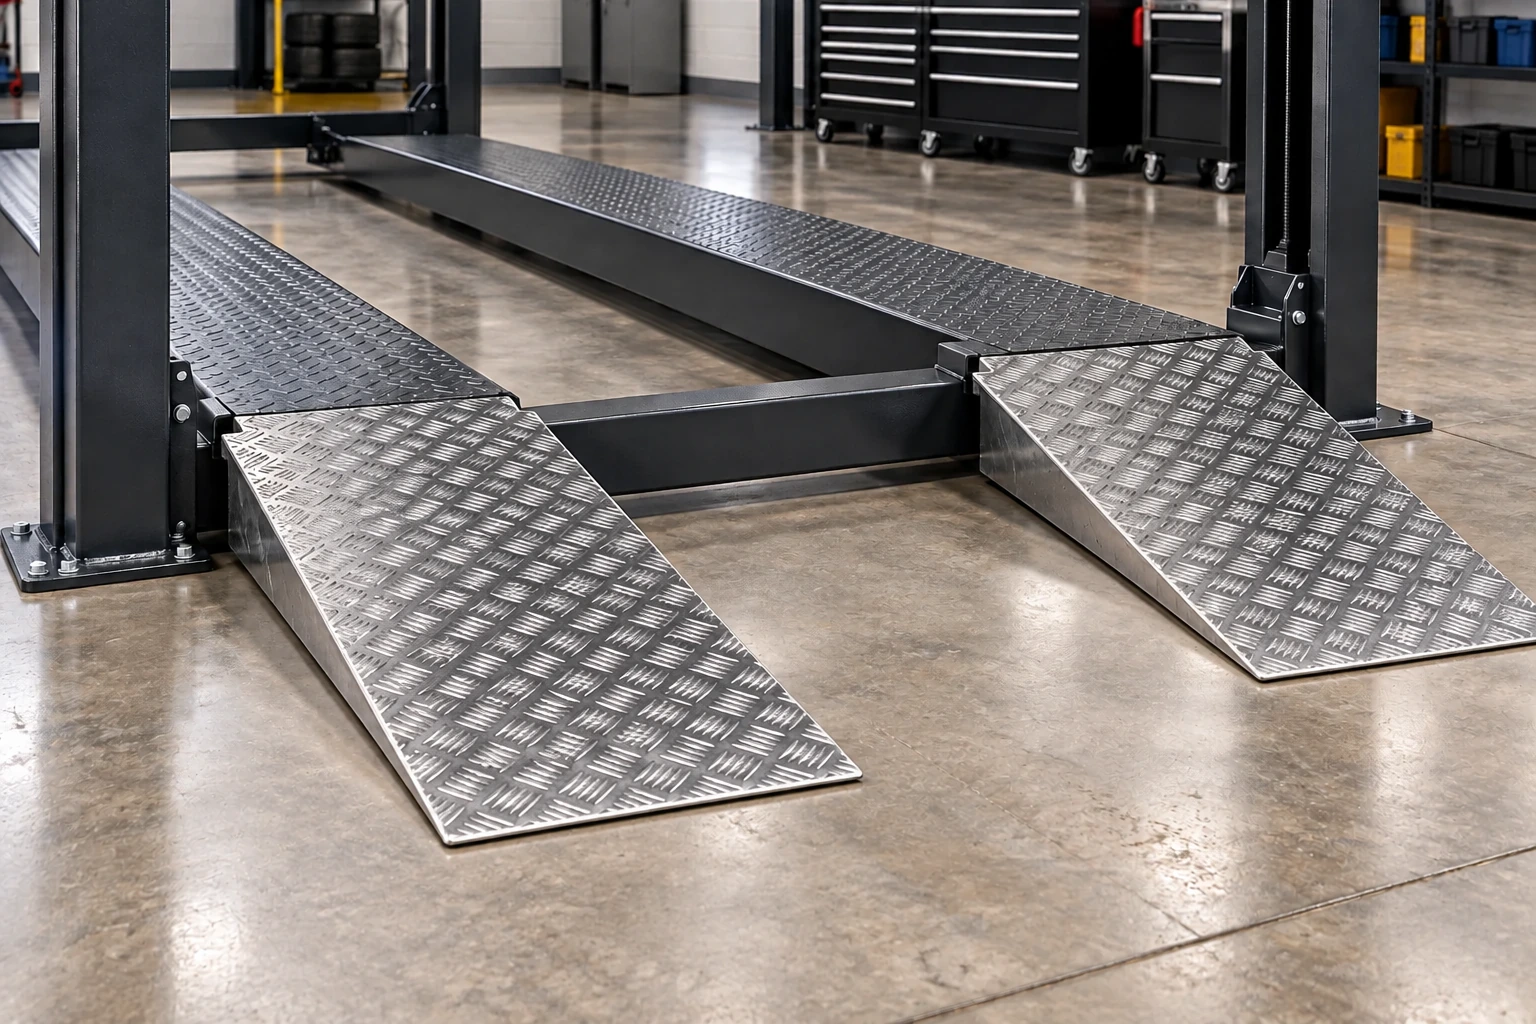
They provide the drive-on approach. Aluminum ramps are lighter to handle, resist rust, and give the lift a clean, finished look. Longer aluminum ramps are also available for selected four-post models to ease the approach for low-clearance vehicles. Secure the ramps and check bumper clearance before driving on.
05
Using a two-post lift
Position the vehicle. Lower the lift fully and swing the arms clear before driving in. Follow the lift’s positioning instructions so the vehicle is balanced.
Set the pads. Place all four at the vehicle’s recommended lifting points. Confirm the arm restraints engage as the arms rise.
Check close to the floor. Pause when the pads make contact. Raise until the tires just clear, then check pad contact and gently rock the vehicle by hand as directed in the owner’s manual. Stay outside the area underneath it. Lower and reposition if anything shifts.
Raise and lock. Watch the vehicle as it rises. Lower onto both safety locks and check their engagement before working underneath.
Lower and drive out. Clear the area, raise slightly to take the weight off the locks, and release them using your lift’s controls. Lower fully and move the arms clear before driving away.
Removing a heavy engine, transmission, or battery changes the vehicle’s balance. Plan the job and use the required high-reach support stands, also called under-hoist stands, before removing major components.
06
Using a four-post lift
Drive on slowly. Secure the ramps and center the tires on the runways. Apply the parking brake, select Park or the specified gear, chock the wheels, and get out.
Check before going higher. Raise a short distance and check tire position and clearance. Watch all four corners as you continue.
Set it on the locks. Lower onto all four safety locks at the same height. Check they are engaged before working underneath or parking below.
Make room to lower. Remove the lower vehicle and clear the area. Raise slightly to free the locks, operate the release and lowering controls, and watch for even movement. Lower fully, remove the wheel chocks, and check the ramps before driving off.
Vehicle overhang and runway fit
The front and rear body of the vehicle often extend past the runways. The tires must stay fully supported, and weight must remain within the lift’s axle and loading limits. Check wheelbase and tire position, not just vehicle length.
For stacked parking, check clearance above the upper car and below the runways. Leave room for the small extra rise needed to release the locks.
07
Keep your lift ready
A quick check before each use helps catch small problems early. Inspect the pads, arms, cables, hoses, and locks. Keep the lift clean and follow its lubrication and maintenance schedule.
Have a qualified lift inspector check it at least once a year. Keep a record of inspections and repairs so service is easy to track.
08
Know when to stop
Unusual noise, uneven movement, shifting pads, leaks, or damaged parts mean it’s time to stop. Keep everyone clear and take the lift out of service until it has been checked.
If a vehicle is stuck raised or the locks won’t release, contact Reliable or a qualified lift technician. Never bypass the locks or attempt improvised lowering.